)
)


Beginner's guide to product photography setup
)
)
For many smaller shops, achieving the perfect product photography setup can be a headache—especially if you sell dozens of products that require you to take photos from different angles. But it doesn’t have to be.
With an understanding of photography principles, a few helpful tricks and techniques, and some basic equipment, you can create stunning product photos and easily remove backgrounds or clean your photo.
This guide will walk you through how to take product photos, and what you’ll need for the perfect setup.
What is product photography?
Product photography involves photographing products to display and promote them via commercial channels like an e-commerce website, sales and marketing collateral, or an online marketplace.
As a subset of commercial photography, product photos are designed to showcase an item in a flattering manner to increase the likelihood that shoppers will make a purchase. They also serve the purpose of highlighting specific features of a product, helping shoppers better understand what they might be buying, and what’s unique about that specific item.
Product photographs are typically accompanied by text—either advertising copy, product descriptions, or a combination of the two. Together, these visual and written media provide a complete context around a specific product, allowing shoppers to make an informed buying decision.
Why is product photography important?
If you run an e-commerce shop or retail store (or sell through online marketplaces), product photography needs to be a top priority. 90% of shoppers say that photos are “extremely important” or “very important” to their purchasing decision. Photos help shoppers investigate products that they want to purchase, compare them with others, and be confident in their purchasing decisions.
 On average, shoppers want to see between three and four images of a product when shopping online. Those images need to be high-quality, detailed, and representative of the actual item they will receive if they click “buy”.
What do you need for a good product photography setup?
For a product photography setup, you'll require:
Camera (phone or DSLR)
Tripod for your phone
White backdrop
A room with natural light from windows
Reflective white cards
Table
An editing tool for post-production
What are the types of product photography?
Product photographs vary significantly depending on how they’re used, where they’re published, and what items they’re showcasing. They can be highly staged and stylized images taken in a studio, or candid shots taken in natural settings.
The most common types of product photography include:
Studio product photos
These are highly staged and polished images that are taken in a controlled, studio environment. The lighting, background, and image composition are all tightly controlled to ensure the desired outcome is achieved for each shot.
White background product photos
These can be captured in a studio or in a casual household setting. They’re staged images that position a product against a plain, white background to create uniformity. White background images are one of the most popular variations in product photography due to their emphasis on the item itself, and their versatility for use across virtually any media and platform.

Product group images and flat lays
These images bundle multiple products together (or products alongside props) into a single composition. In some cases, the goal is to show how multiple individual products come together into an ensemble (such as the clothing example below). In other cases, props might be included to show, for example, what ingredients went into making a specific product.

Lifestyle product photos
These are product photographs that stage the item in a real-world setting to help the buyer visualize how it’s likely to be used.
A common example of lifestyle photography is any company that specializes in outdoor living equipment like camping or water sports gear. These companies will photograph their products “in action” to create a sense of the lifestyle that can be achieved if the item is purchased.

Close-up product photos
Close-up product photos are typically added alongside more traditional images to provide more detail and focus on specific elements of a product. They’re super high-resolution images that zoom in on specific details on the object to emphasize what’s unique about the item.
Jewelry product photography, for example, often uses this technique to showcase fine details like diamonds, cuts, and engravings. The example below is a super close up of a backpack that shows the intricate stitching and accessories that come with the item.

Further reading:
Picking the right camera for DIY photography
There’s often an assumption that you need an expensive, high-quality camera to take professional-looking product photographs. While that may have been true in the Mad Men days of advertising, today the technology landscape looks quite different.
Modern smartphones contain cameras, lenses, settings, and AI features that are more than capable of capturing publish-worthy product images. Sure, expensive cameras and lenses might give you more options when shooting product photography to fully customize an image composition. But smartphones are still more than capable for most types of product photography.
That being said, there are still four fundamental photographic elements that you’ll need to be aware of, regardless of the device you're using:
Lens: You need a camera lens that will be able to capture product images in high-definition, and be able to adapt to the settings listed below.
Aperture: This is a setting that determines how wide your lens is when snapping a shot, which dictates how much light is let in.
Shutter speed: This setting determines how quickly the shutter opens and closes when taking a photograph. Faster shutter speeds let in less light, but create a sharper image.
ISO: This setting affects your camera’s sensitivity to light. This needs to be balanced with the settings above, along with the lighting you use when staging your shot.
As mentioned, modern smartphones are more than capable of accommodating the settings mentioned above. The iPhone or the newest Samsung models in particular are capable of producing stunning images thanks to their powerful lenses and array of manual and automatic photography settings. Auto-exposure and auto-focus, for example, are two features that are easy to use, and will ensure that you always capture sharp images that are properly exposed.
Here’s one of the recent winners of the “Shot on iPhone” competition to demonstrate how good the cameras on these devices really are.

When shooting on a mobile phone, follow these best practices and tips:
Ensure the device is fully charged and that you have backup storage for your images
Set your white balance to match the tone and temperature of your setup
Check your exposure—alter it manually if required. Use the auto exposure feature to keep things simple.
Focus the lens on your product by tapping it on your screen. Use auto focus to automatically zero in on the focal point in the image.
Lock your camera settings so that they’re consistent for all images
If you want something a bit more powerful than a smartphone, then consider a professional but affordable camera like the Sony a6400. This will give you a studio-quality camera—with all the flexibility and customization that comes with it—at roughly the same cost as a new iPhone.
Here are some standard settings you should know when using a professional camera for product photography:
Aperture should be between f/8 and f/11. This will ensure that you have the most depth of field possible, giving you a sharp and focussed image.
Shutter speed should be at 1/125th or higher in a well-lit room. Shutter speed acts as a counterbalance to aperture. With the above settings, you’re letting in less light, therefore your shutter speed needs to be slower to adequately light the object.
ISO should be at 100 to tune your camera to the appropriate light sensitivity for the settings above.
Whether you use a smartphone or a professional camera, always be sure to use a tripod to stabilize your shots. This will ensure that your images are properly focussed and consistently framed.
The importance of backgrounds and natural light
While cameras often get most of the attention in photography, lighting and backgrounds are perhaps more important when shooting product photography. In fact, light is considered one of the most important base elements on an image, impacting its tone, appearance, and overall quality.
When selecting a background for your image, consider how it will be used and the media on which it will be published. In many cases, you’ll need multiple image variations with different backgrounds.
What backgrounds should be used for product photography?
White backgrounds: These help the product in your photo pop, focussing the viewer's attention on the highest-priority item. It’s an ideal background—and sometimes a requirement—for ecommerce stores and online marketplaces. You can use a variety of tools to create white backgrounds, including a white paper sweep, a bed sheet or tablecloth, a white wall, or a poster board.
Colored backgrounds: These provide alignment with your brand, and can create a distinct theme or mood for your image, making this a perfect option for marketing campaigns. Use the same materials as above in your shoots, but with the desired color for your needs. Alternatively, you can shoot on white or a green screen or adjusting the background colors.
Lifestyle backgrounds: As mentioned above, lifestyle backgrounds situate your product in a real-world setting. Products can either be staged and shot outside, or you can add lifestyle backgrounds in post-production.
For lighting, the two most common options are natural light and artificial light.
Natural light is, you guess it, light that comes from the sun. This is considered a “soft light” as it creates a uniform, spread out light source across an object. Because natural light is, well, natural, it’s less controllable than artificial sources. To get around that, use items to deflect, block, and diffuse light as required. Foam boards, reflectors, and blockers all help to bend natural light to your needs.
If shooting inside, and using natural light from a window or door, we recommend positioning your table at a 45-degree angle to the light source. This will create greater uniformity across the object. Shoot when the light is brightest to avoid shadows, and use the tools mentioned above to bend the light to your will.
Here’s an example of a photograph shot with natural light.

Artificial light refers to any light source that comes from a human-made object. Think ceiling lights, lamps, or photography lights. This is considered “hard” light because it produces a small, more focussed light surface.
Using artificial light offers more customization, with the trade off that you need to understand lighting techniques and how to position sources to create uniformity.
Here’s an example of a photograph shot with artificial light.

While lighting and backgrounds are, of course, incredibly important in the creation of a quality product photograph, modern photo editing tools provide some leeway.
If you use a photo editor like Photoroom, for example, to retouch images after the shoot, you don’t need to worry as much about getting the perfect background or lighting. As long as the image you capture is well-focussed, shot from multiple angles, and adequately lit, you can adjust and swap out various photo elements to create a photograph (or photographs) that’s suitable for your needs.
Tips for taking good product pictures from multiple angles
Navigate to almost any ecommerce shop and you’ll see products displayed from a variety of different angles. There’s a reason for this. Shoppers want to be able to examine a product from multiple angles to learn about its unique details and features.
To meet this demand, shop owners need to ensure that they photograph their products from at least five key angles:
Eye level: How the product would appear if the shopper was looking straight at it.
High angle: How the product would appear if the shopper was looking down at it.
Low angle: How the product would appear if the shopper was looking up at it.
Bird’s eye: How the product would appear if the shopper was standing over it.
Side or diagonal angles: How the product would appear if the shopper moved to either side of the product.
The goal with these shots is to mimic how a shopper would examine an item in store through a display case or in their hands. They would likely look at it from different perspectives to better understand its fine details. On top of multiple angles, you can also include the close-up shots we talked about earlier to provide even more details and perspectives on the product.
Here’s an example of how Tiffany & Co. clusters their product photographs to show various angles:

The role of post-processing and editing in product photography
When people talk about how to take good product pictures, they mostly focus on the shooting phase. But post-processing is equally, if not more, important to the production process.
Once you’re done shooting product photography, the next step is to review the images you’re taken and select the best ones for post-production. Transfer your images to a computer or device with a larger screen so that you can view the images in a different format, and see them in more detail. Make a shortlist of the best images you want to use in your sales and marketing.
Next, consider using a popular photo editing software like Adobe, GIMP, or Photoroom to make adjustments and enhancements to your product photos.
This can include:
Adjusting lighting
Adding new backgrounds
Adding shadows
Repairing blemishes and other issues
Enhancing or altering the contrast, hue, or saturation
Removing unwanted elements from the image
Resizing the image
Exporting for different formats, like web or print
Here’s an example of an image that went through a simple light correction to make the colors more vibrant and the focus sharper.
 For businesses that need to create many variations of their product photos—or who want to recycle existing ones from older shoots—Photoroom is a perfect solution. This app gives you complete flexibility over the background you use in your image, allowing you to remove backgrounds, generate new ones that are either transparent, solid colors, abstract, or lifestyle and dynamically resize images for multiple formats.
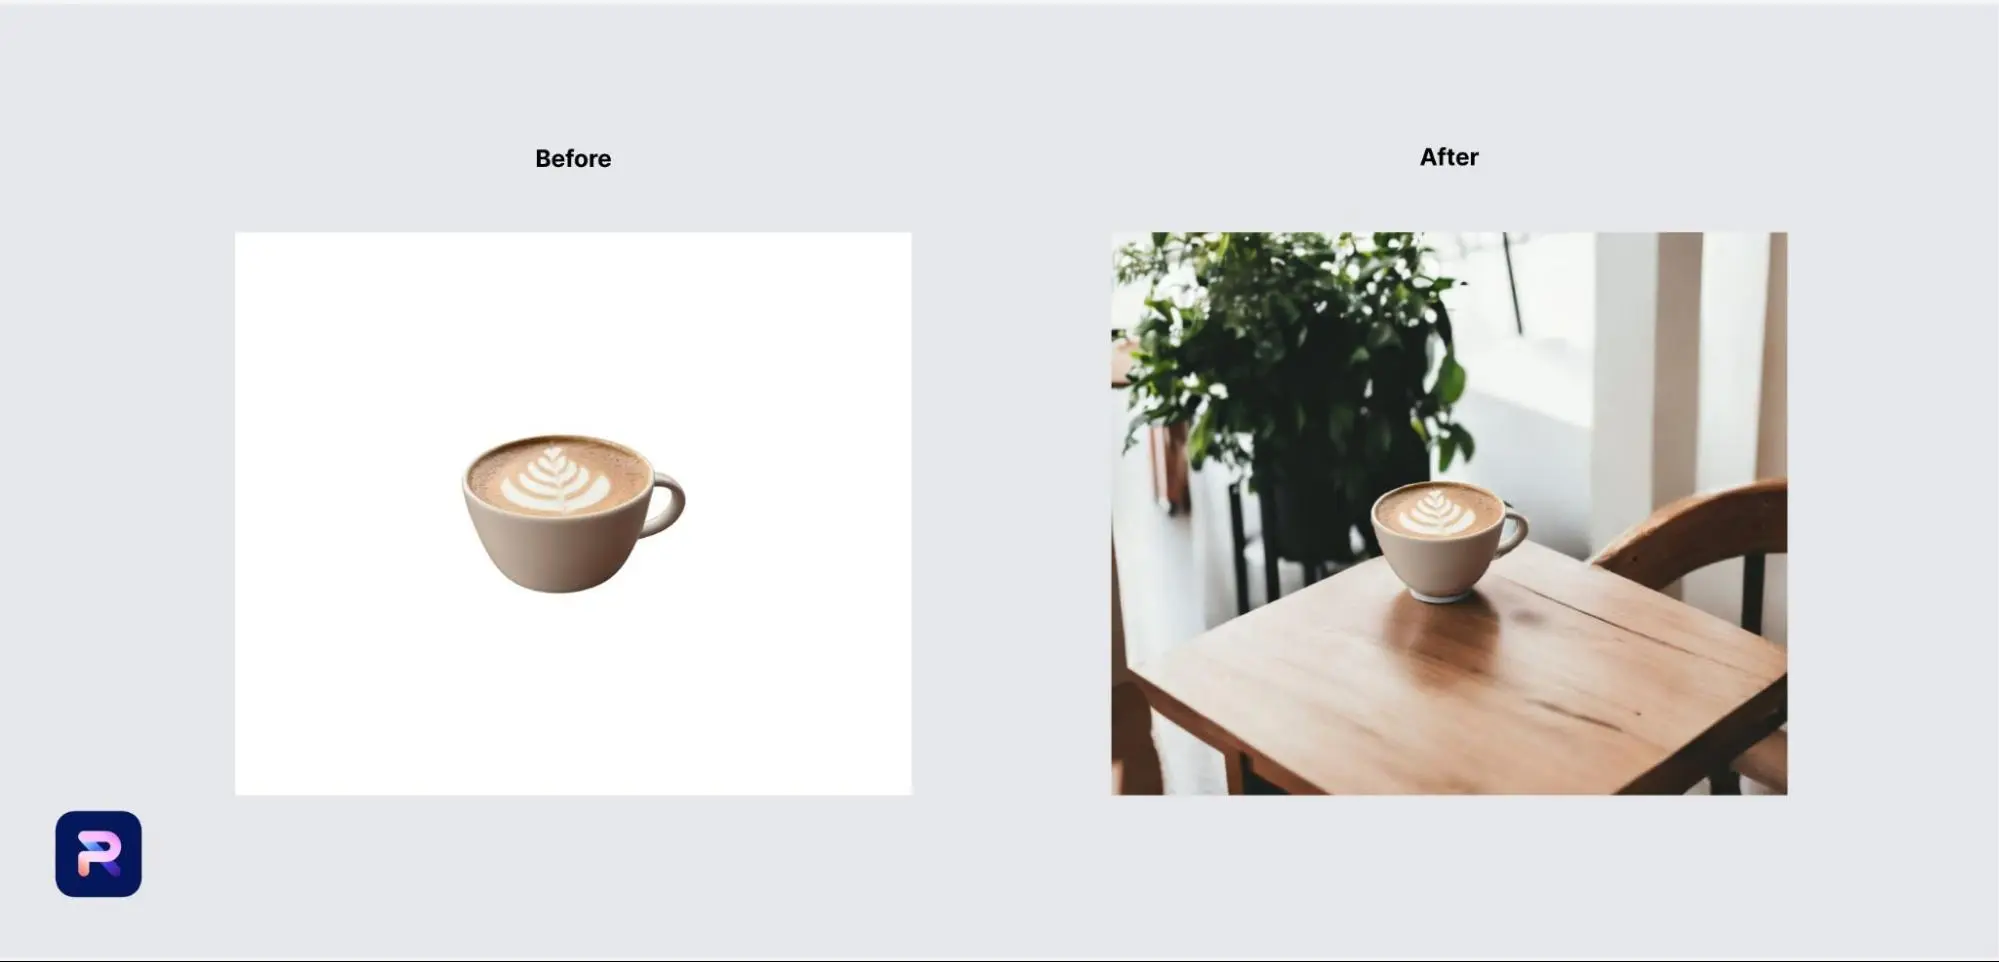
Photoroom’s generative AI background tool can be used to create completely unique backgrounds based on the products contained in your image. These can be either automatically created, or manually generated using word-based prompts like the one below. You can also use an image from your gallery as inspiration for your desired background.
“A cup of coffee sitting on a light wooden table.”
 AI technology is also used to enhance lighting, add shadows, and clean the image from defaults. So, while properly staging and capturing product images is important, Photoroom gives you some wiggle room to work with.
Edit and enhance your product photographs with Photoroom
Ready to start editing your product photos? Try Photoroom for yourself today. It’s accessible on both mobile devices and desktop, and can be downloaded from the App Store, the Google Play Store, or by using Photoroom Web. Set up your account in less than a minute, and start saving time and focusing on more important tasks right away.
Product photography setup FAQ
What is the best camera for product photography?
For low-cost options, the Canon EOS Rebel T7 or the Nikon D3500 are great entry-level DSLRs that offer good image quality and versatility at a reasonable price point. They provide sufficient features for product photography without breaking the bank.
For more advanced options that still offer excellent value, consider cameras like the Sony A7 III or the Fujifilm X-T4. These mirrorless cameras offer higher-end features, superb image quality, and flexibility for various shooting scenarios, including product photography. They provide more advanced functionalities while staying relatively cost-effective compared to top-tier professional cameras.
What are best lenses for product photography?
The ideal lens for product photography hinges on your needs. Macro lenses nail the details of small items, primes like 50mm/85mm/100mm offer sharpness and adaptability, while tilt-shift lenses control perspective. Zoom lenses like 24-70mm or 24-105mm provide flexibility, and wide-angles can frame larger products or add context. Your choice depends on your product, shooting style, and desired outcome, so experimenting helps find what suits you best.
Related articles:
)
)
)
)
)
)
)
)
)
)
)