)
)


Mastering the art of ghost mannequin photography: A comprehensive guide
)
)
Ghost mannequin photography is a time and cost-efficient way to showcase your clothing products with high-quality images that demonstrate how garments fit and drape over the body, without actually having a mannequin or person in the shot.
But figuring out how to take pictures of clothes without a mannequin can feel like a daunting task that involves hours of cutting out and enhancing images in a clunky photo editor like Photoshop.
Luckily, with Photoroom, it doesn’t have to be. Our community of resellers, makers, and small business owners voiced a growing interest in how to achieve the ghost mannequin effect for their product photos, so that’s why we created this guide to help you take your photos from amateur to professional in minutes, just like this:
 Read on to learn the simple and easy process of taking product photos with your smartphone and editing them in Photoroom to create the ghost mannequin effect for your online product listings.
How to do ghost mannequin photography
Choose the right model or mannequin
Using models or mannequins is essential when photographing apparel to showcase the unique shape and fit of each item. Yet, the ultimate goal often involves making these aids invisible in the final product images to achieve the ghost mannequin effect.
This technique creates the illusion of clothing floating in space but requires skillful editing to perfect, presenting a challenge if you’re new to image editing. By capturing your product from various angles on a model (which could be you) or mannequin, you can gather a versatile, compelling selection of visuals for your online listings.
For the best outcome, photographing models in static poses is key to making the transition to ghost mannequin images smoother. Simplifying the model's attire and tying long hair back can help minimize distractions, focusing attention on the product and simplifying the editing process.
 The choice of mannequin also plays a significant role; options range from realistic to abstract designs. The best selections often include white matte mannequins for their non-reflective qualities, especially when shooting against white backgrounds, making them easier to edit out.
The fit of your clothing on the model or mannequin is crucial. Proper sizing or garment adjustment better depicts your products.
Use the right equipment and setup
To successfully achieve the ghost mannequin photography effect, you need to create high-quality, professional photos in a studio environment. Renting out studio space and lights or converting your living room into a photography studio is expensive and time-consuming. Luckily, we have a solution for this to help you achieve the invisible mannequin look, and you don’t even need a mannequin or a professional camera.
Here’s what you need:
Your smartphone (make sure to wipe the lens clean before you start)
Selfie tripod (or a stack of books that you can lean your phone against)
Natural light
A mannequin, model, friend, or your own body
📸 PRO TIP: If you have an iPhone, use the 10-second timer setting to take photos of yourself.

Photograph your products
When you're capturing images of tops, make sure your camera is level with the chest area of the garment to ensure the most flattering angle. For bottoms, align your camera with the hip area. Shooting from too high or too low can make the garment appear distorted, giving it a tapered and inaccurate look.
Your setup is another critical factor. Make sure you have enough space between your camera (i.e., your smartphone) and the mannequin or your body. Your natural light source should come from behind the camera lens and place your mannequin or stand in front of a white wall or area with minimal clutter.
📌 PRO TIP: If you don’t have an open white wall, don’t worry. With Photoroom, you can instantly remove backgrounds and replace them with a clean, studio look (just like I did).
How to achieve the ghost mannequin effect with Photoroom
Step 1. Prep your products
Depending on the clothing you’re photographing, you might need to steam, iron, or press the garments ahead of your photoshoot. Get everything ready before you start to make the process faster and easier.
📌 PRO TIP: For efficiency, create a shot list ahead of your photoshoot so you know how many garments you want to photograph during your session.
Step 2. Declutter your space
If you have a clean white wall, great. But if not, declutter your background as much as possible. This will make it easier to remove the backgrounds of your product photos to replace them with a professional studio background.
Step 3. Set up your selfie tripod
Depending on the types of garments you’re photographing, you might need to move your selfie tripod around. To increase your workflow, photograph the same types of garments in batches.
You can also edit hundreds of images at once and generate AI backgrounds in bulk with Photoroom's Batch Mode.
For example, start with tops, then pants, and then dresses so you don’t have to keep adjusting the position of your selfie tripod.
For the best light, position the tripod so the natural light comes from behind the lens versus having the lens face the light source. If you don’t have a lot of natural light, don’t stress. You can use the Light On feature to brighten your products (more on this soon).
Here’s the setup I used in my living room:
 📌 PRO TIP: Take a few test shots of each garment type and mark the floor for each with a piece of tape so you know where to position the tripod (and where to stand or position the mannequin).
Step 4. Photograph your garments
You can use a mannequin, ask a friend for help, or photograph your apparel products on your body.
I photographed all the clothing on my body for two reasons:
It’s cost-effective. I didn’t have to pay for a mannequin or a model.
It’s faster. I didn’t have to repeatedly dress and undress a mannequin.
For each product, I shot the front and back to give shoppers a 360 view of the garment. If it has unique details, you can take close-up shots (or macro shots) of those details.
 📌 PRO TIP: Take shots of the insides of garments (like back necklines or waistbands) on a flat surface so you can insert them into the photo after you remove the mannequin or body (I’ll walk you through this soon). For products with a collar, make sure the garment is open and the inner back is visible. You can also turn the item inside out to fully capture the details.

Step 5. Edit and enhance your photos in Photoroom
Woo hoo! You’ve photographed all your products. Take a quick break, walk around the block, have a cup of coffee, and then open up the Photoroom app on your phone (Android or iPhone) or laptop.
Now it’s time for the fun part. Turning your (slightly sloppy) smartphone product photos into high-quality, studio images with the ghost mannequin effect.
Follow these steps
1. Log in to Photoroom on the web
2. Select Batch from the left toolbar
 3. Drag and drop all your photos to upload them into Photoroom (I look amazing, I know. )
 4. Click on Select template. I like the light grey Professional Product Imagery template, but the choice is yours. However, I recommend using a clean background versus a lifestyle or patterned one for the ghost mannequin effect.
📌 PRO TIP: Photoroom has templates for popular sales channels like Shopify, Etsy, eBay, Vinted, Instagram, Facebook, and more. If you sell through any of these channels, choose your preferred template in this step.
 💡 Do you want to use a colored background instead of a neutral tone? Tap the background of your image, choose a color from the existing palette, type in a HEX code, or select Advanced to play until you find the perfect background color.
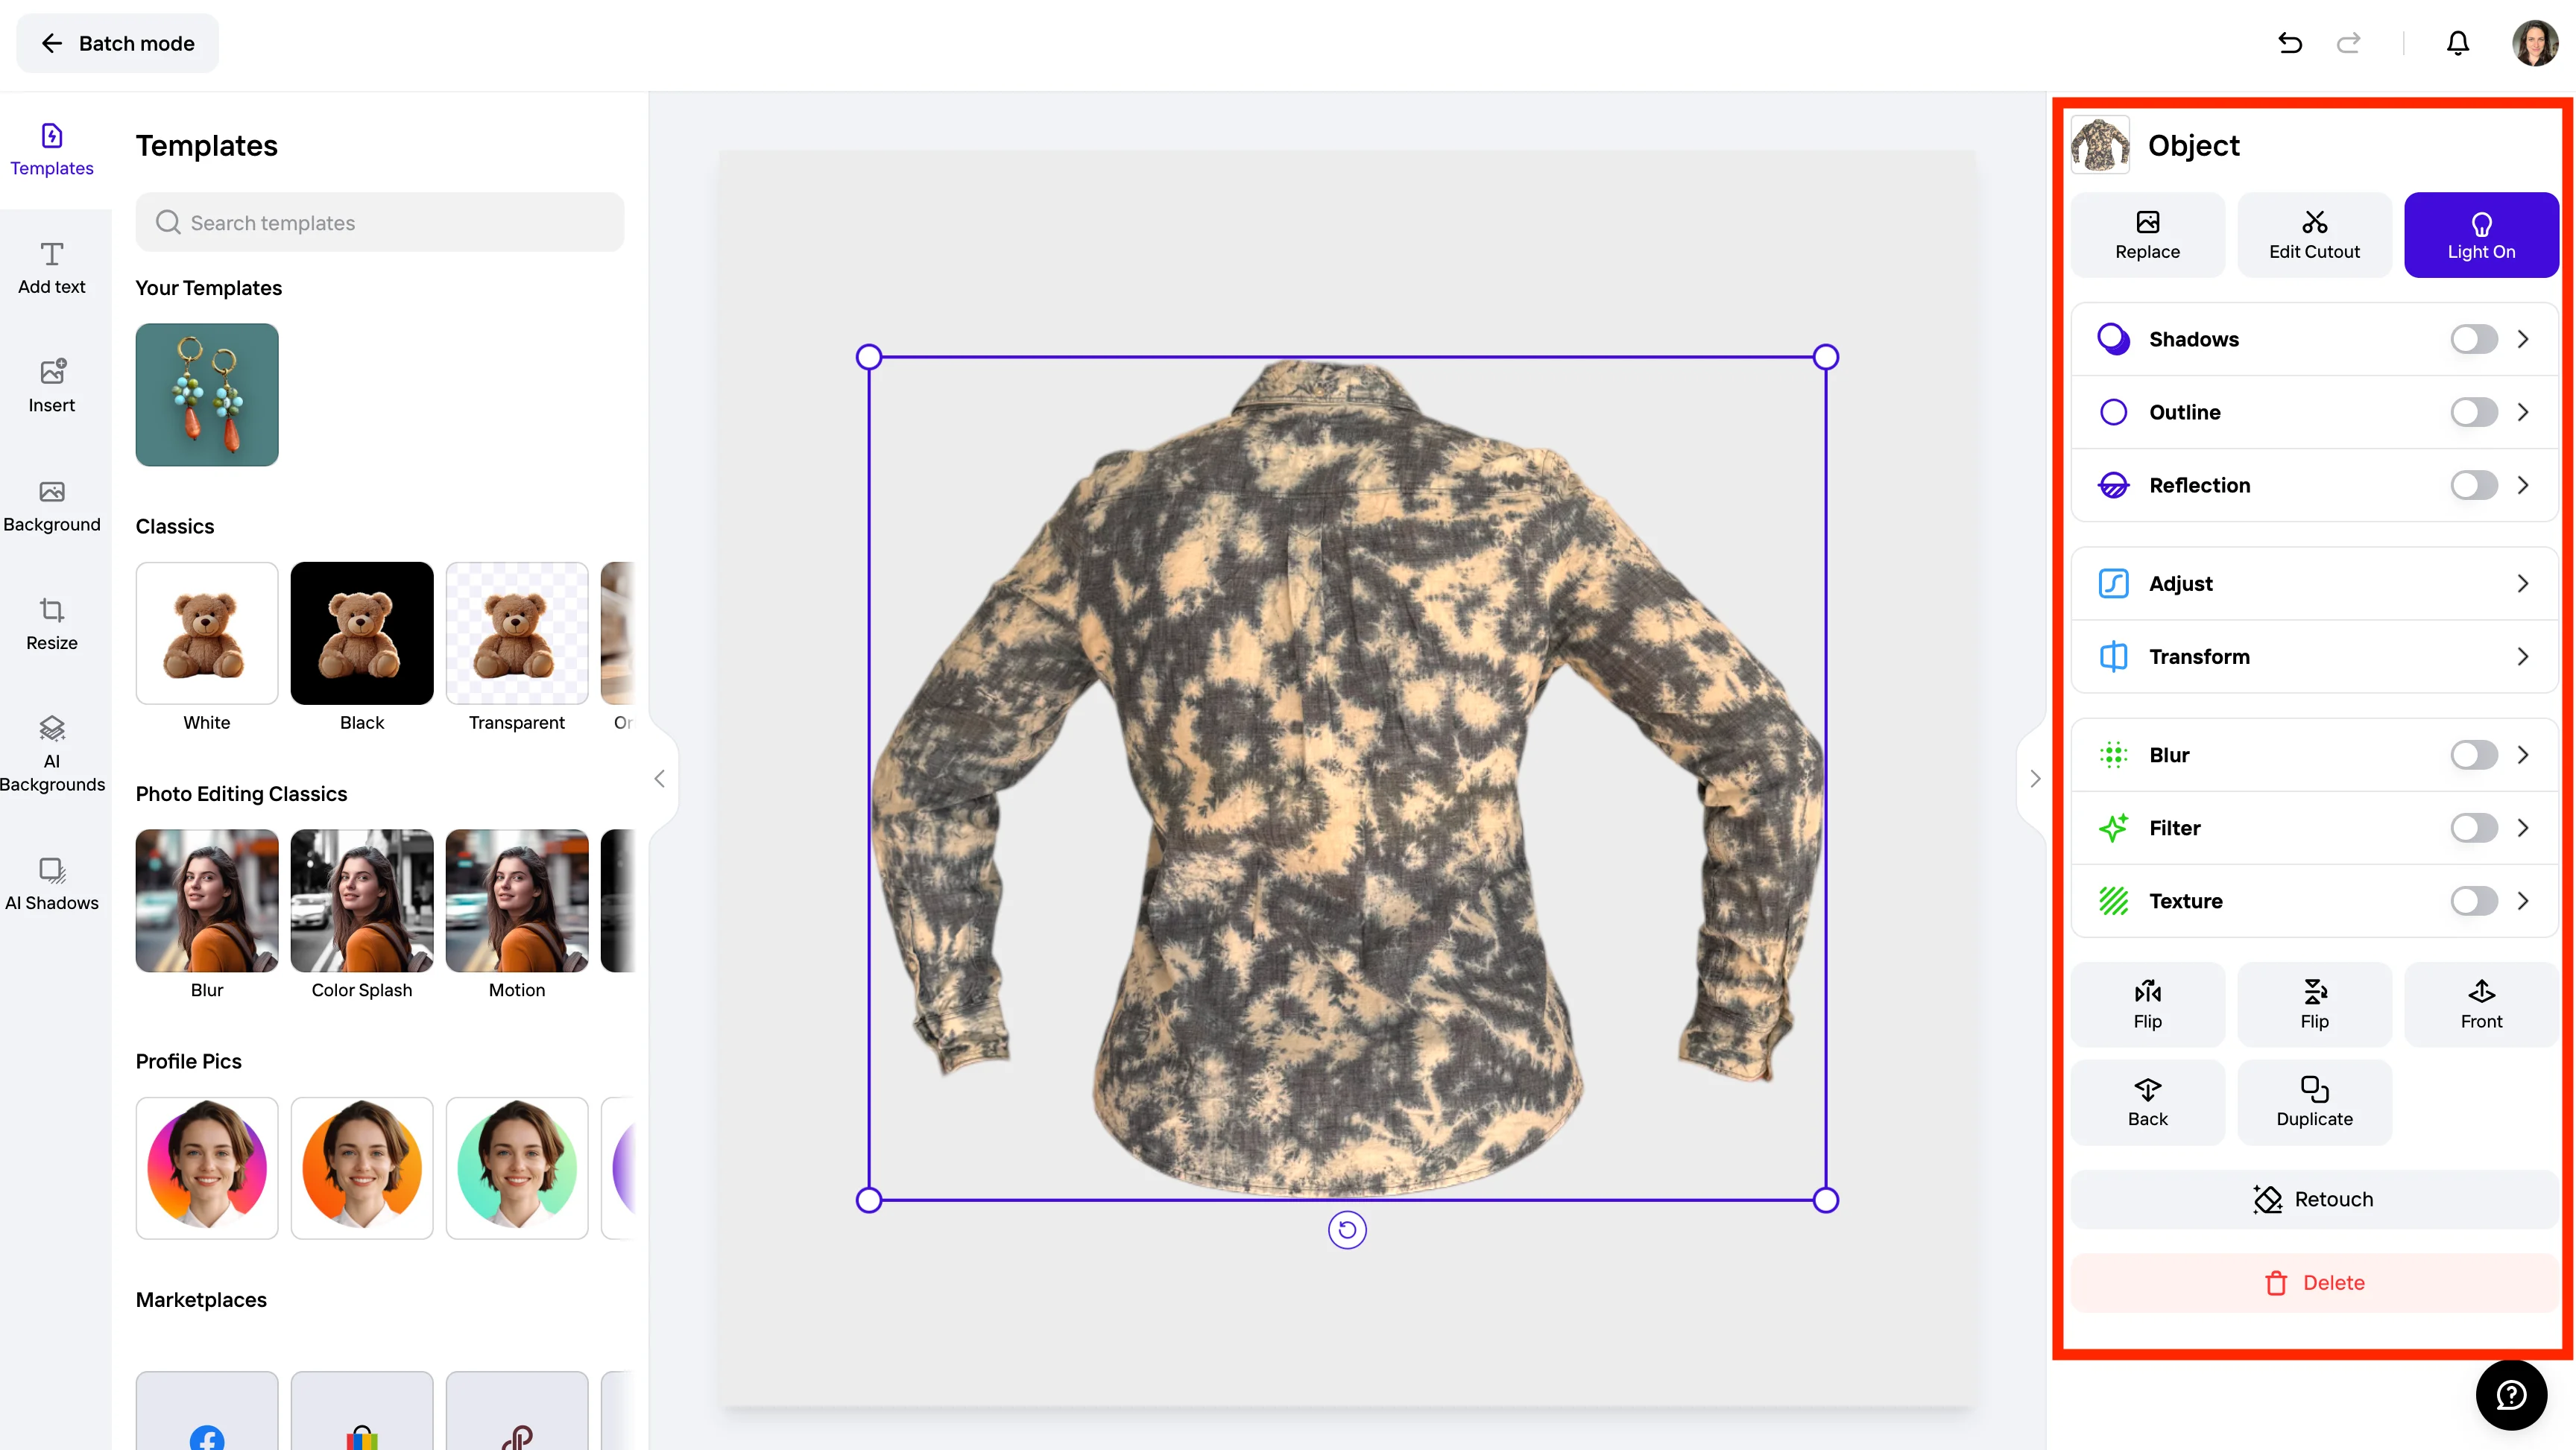
 5. Now that you’ve applied this template to all the images, it’s time for the fun part, editing! Click on the image you want to edit, then you’ll see this screen.
 6. Click on the object (in this case, me). The editing toolbar on the right will appear.
7. Click on Edit Cutout to remove your body from the image.
8. Toggle to Manual to adjust the brush size and erase your body from the image.
 9. Once you’ve erased most of your body, toggle back to Guided and tap on the remaining parts of your body to erase everything.
 📌 PRO TIP: Sometimes depending on the colors in the image, the Guided eraser eliminates parts of the object you want to keep. In this case, stick to the Manual setting and reduce the brush size to erase the small bits.
10. After you’ve completely erased your body, click Confirm.
 11. Now it’s time to finish editing your product photo. Here’s what I did:
Toggled Shadow off
Clicked Light On
Increased the size of the product image and centered it
 But we have a little problem. The back neckline of the shirt is missing since it was covered by my body.
12. Go to the left toolbar and click Insert.
 13. Click select an image.
 14. Choose the flat-lay photo you took of the inner neckline of your top to add it to your workspace. Make sure it’s selected, and click Edit Cutout.
 15. Use the Manual eraser to remove all the parts of the image you don’t need. I only needed the inner neckline, so I erased most of the shirt from the image. When you’re done, click Confirm.
 16. Now move the cutout of the object you’re inserting into the image until it’s in the right place, then click Back to place it behind your original image.
 📌 PRO TIP: If the cutout isn’t fitting quite right, use the Edit Cutout tool again to erase additional parts until it’s perfect.
17. If you clicked Light On for the original image (or made any other edits to the product image itself), you should also do it for the cutout you add to make sure they match.
18. Click back to Batch mode to select your next product image. When you’re done editing all your product photos, click Download your images.
 📌 PRO TIP: As you’re working through all the images, use the tools on the right to adjust brightness, warmth, saturation, and more to make sure it looks realistic and matches the colors in all images.
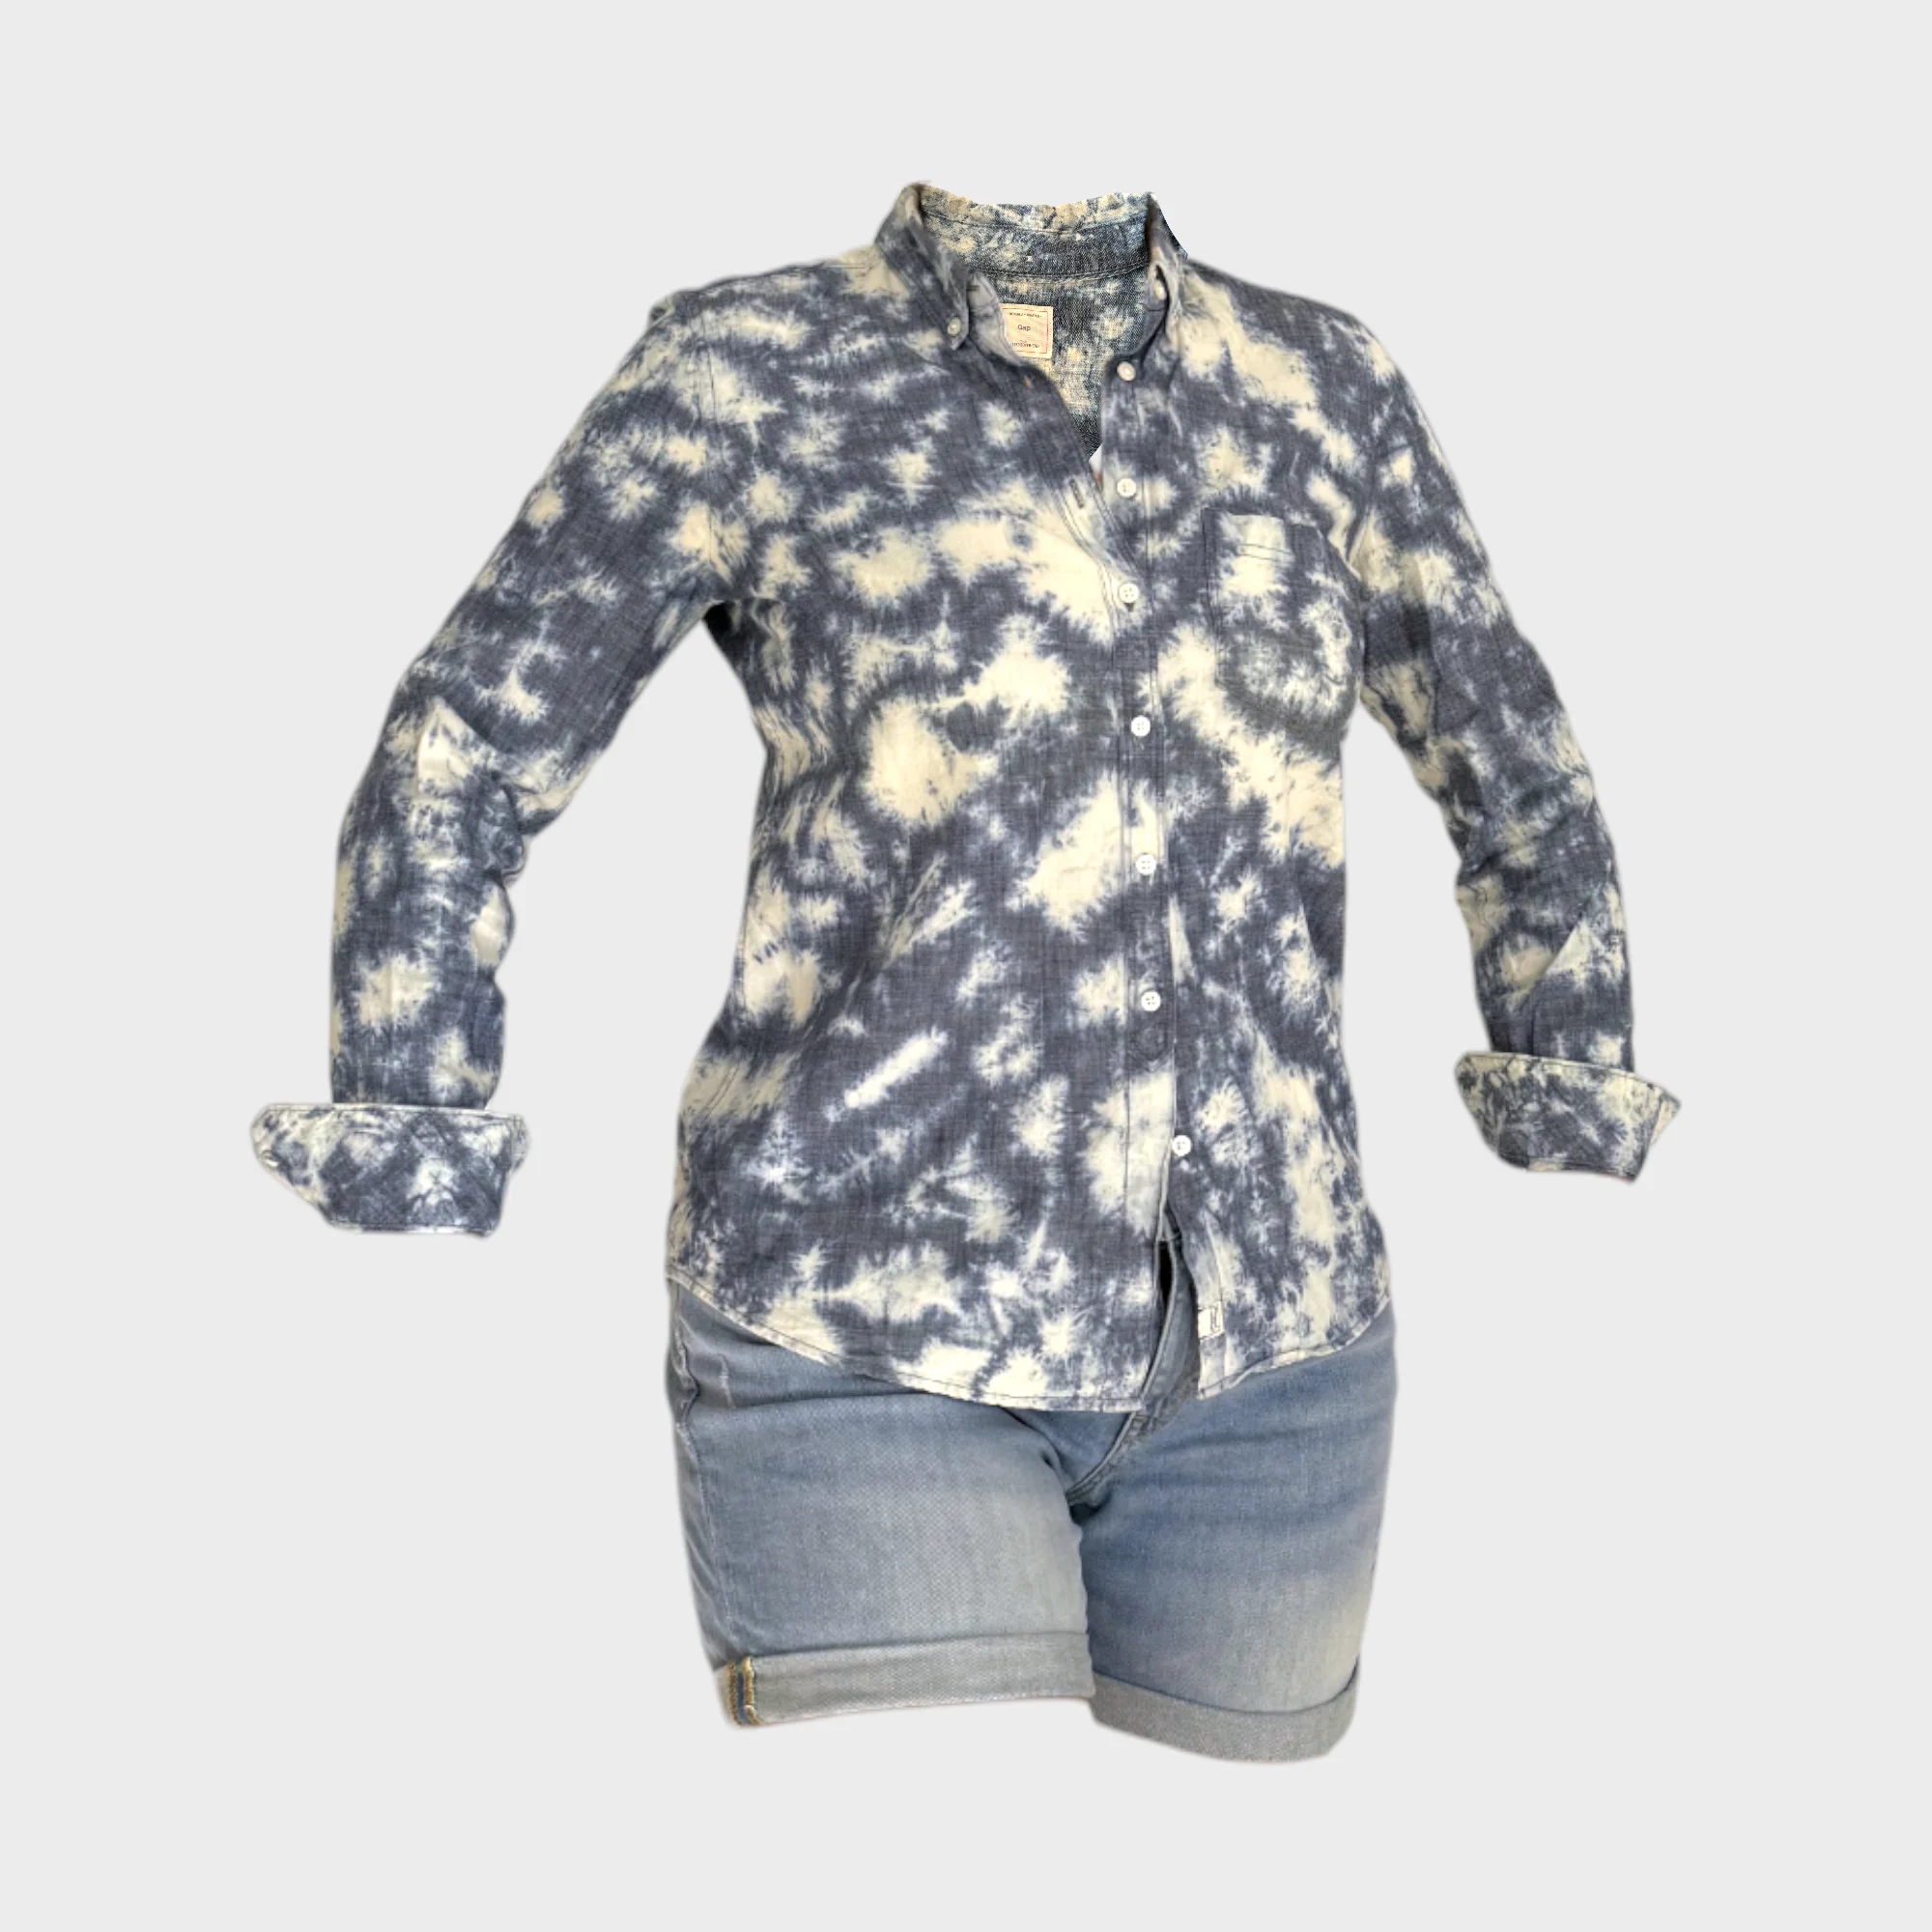
 For example, I decreased the warmth of the back and front shot of this top to make it look more like the real-life colors and I increased the hue of the back version to match it better to the front version. I’m not a professional photographer or editor, I just played around until they looked the same (or very close).
PRO TIP: Ghost mannequin photography is mainly used to show a 360, 3D view of products on a clean white or grey background. But if you want to use a different type of background, you can choose from one of the many other templates available in Photoroom, or generate an AI product photography background from text or image prompts.
Step 6. Upload your product photos to your website or marketplace
Time to start selling! Now you have high-quality ghost mannequin product photography that you can upload to your e-commerce website or marketplace listings.
Elevate your e-commerce game with ghost mannequin photography
Mastering ghost mannequin photography can be a game-changer for your online sales, allowing you to showcase your products in a professional and captivating way without the complexity and cost of traditional product photography. By choosing the right model or mannequin, using the right setup, and following this step-by-step guide, you can capture the essence and fit of your garments in a way that draws customers in.
Make sure you choose the right partner in this creative journey — one that will help simplify the process of achieving the ghost mannequin effect. Whether you're photographing a vibrant collection of apparel or a single standout piece, the techniques you learned today will empower you to elevate your e-commerce visuals and engage your audience more effectively.
Start experimenting with these tips, and watch how they transform your brand's online presence and conversion rates.
 📚 Additional reading:
Ghost mannequin photography FAQ
What is the ghost mannequin effect in photography?
The ghost mannequin effect (also referred to as the invisible mannequin effect) is when you edit or retouch a product photo to remove the mannequin or model from the image. It’s used to show the way apparel fits and drapes over the body without having a mannequin or model in the shot.
What is a mannequin in photography?
A mannequin can be used in product photography to demonstrate how clothing fits and drapes on the body.
How do you remove a mannequin from a photo?
Open your image in Photoroom. After the background has been automatically removed, click on the product image and use the Erase tool to remove the mannequin or your body. Enhance the photo by selecting from an existing background template or creating an AI-generated background.
Is there a way to remove an object from a photo?
Yes. Photoroom’s AI Retouch feature is the best free tool to clean up your pictures and remove any object, person, or watermark in 3 seconds.
How can I take things out of a photo?
Open your Photoroom app (Web, Google, or Apple). Select an image from your camera roll. Use the brush tool to select the object you want to clean from your picture. Adjust the brush size as needed. Our magic eraser automatically identifies the unwanted object and erases all undesirable elements. When you’re happy with the results, export the photo.